If you don’t have Photoshop and want to create a simple yet modern looking mockup design then you can make it in Ms Word. I have prepared a report template in Ms Word and have converted the same report in PDF format. Now I want to send the mockup of a page from that report to my client to showcase what I’ve made. If you need the same then please read on.
Watch the below short video highlighting the entire process. You can also download the same template from the link at the end of this post.
How to make a flyer mockup in Ms Word
I already have converted my design into a PDF. All I need now is to convert the same PDF into PNG image and then make a mockup of it in Ms Word. Follow these simple steps:
Convert PDF to PNG in Acrobat
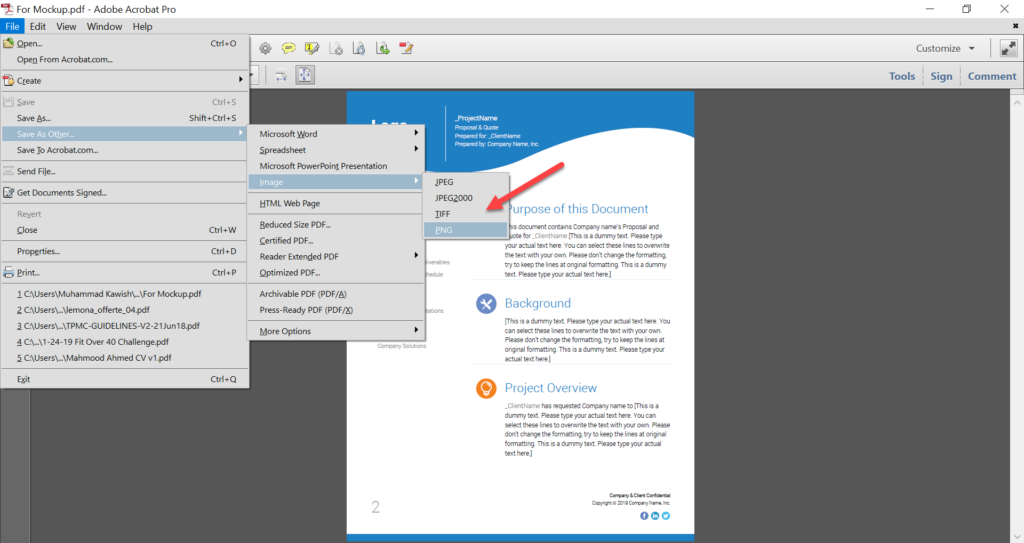
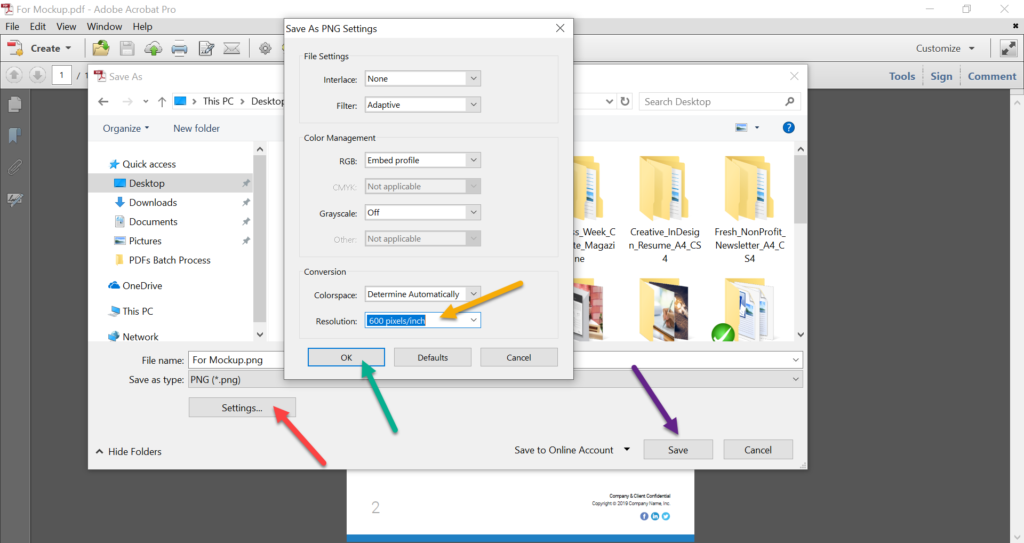
Open your PDF in Adobe Acrobat. Go to the File > Save as Other… > Image > PNG to convert your PDF into a PNG image first. Then click on the Settings… button on the Save As dialog box and select 600 pixels/inch from the “Resolution:” dropdown at the bottom. Click OK and Save your PNG.
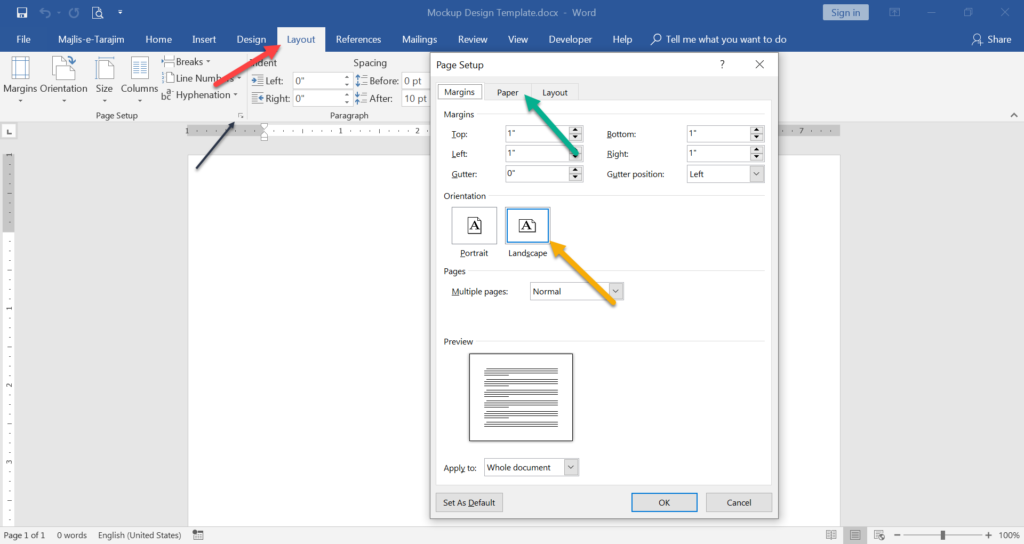
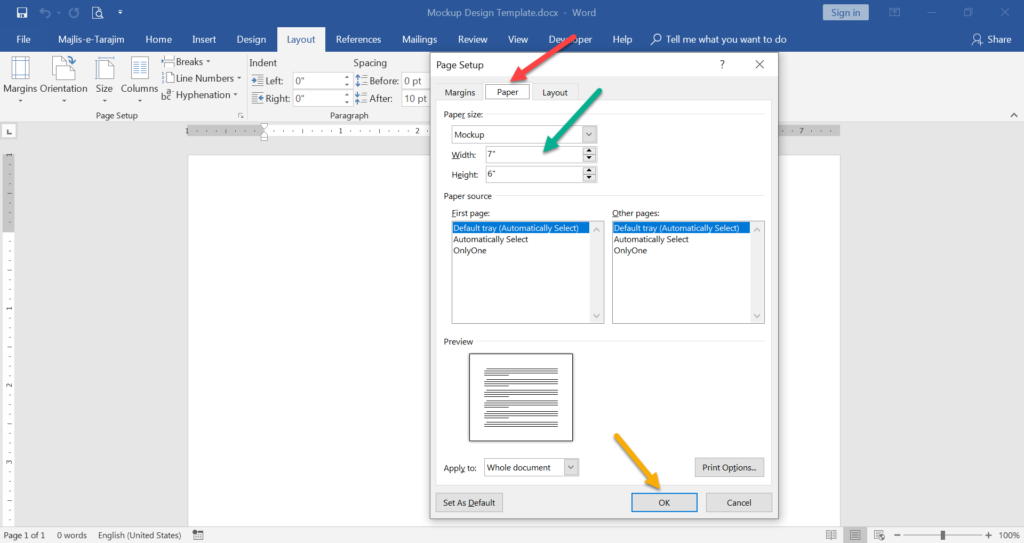
Now create and open a new Word document. On a Word document, go to the “Layout” tab at the ribbon and click on the tiny arrow at the “Page Setup” group to open the Page Setup dialog box. Select “Landscape” Orientation from the dialog box, then go to the “Paper” tab at the same dialog box and create a page size of 7×6. Then click OK.
Change page background color
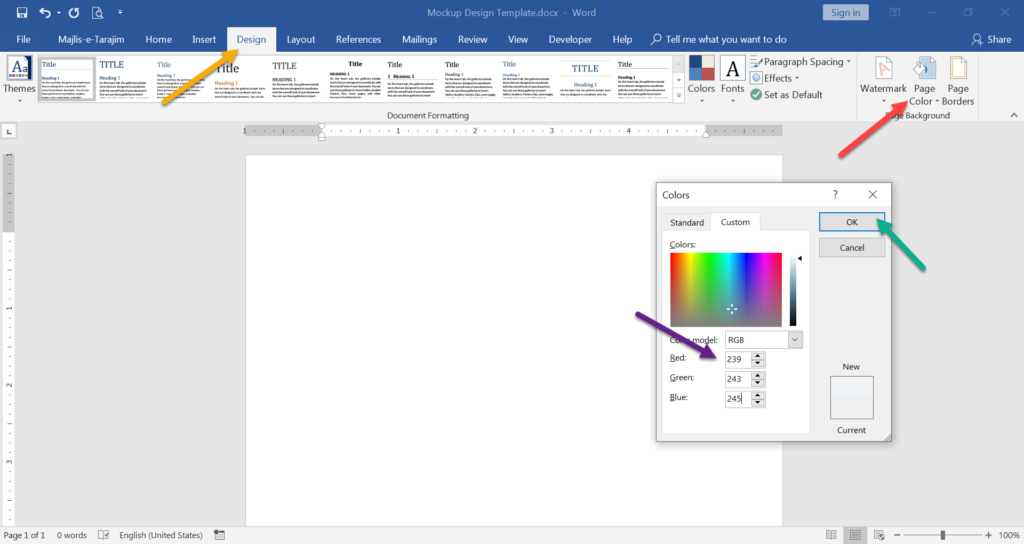
To change the page background color, simply go to the Design tab > Page Color at “Page Background” group. Make a custom color of R:239 G:243 B:245 and click OK to continue.
Insert image and apply effects on it
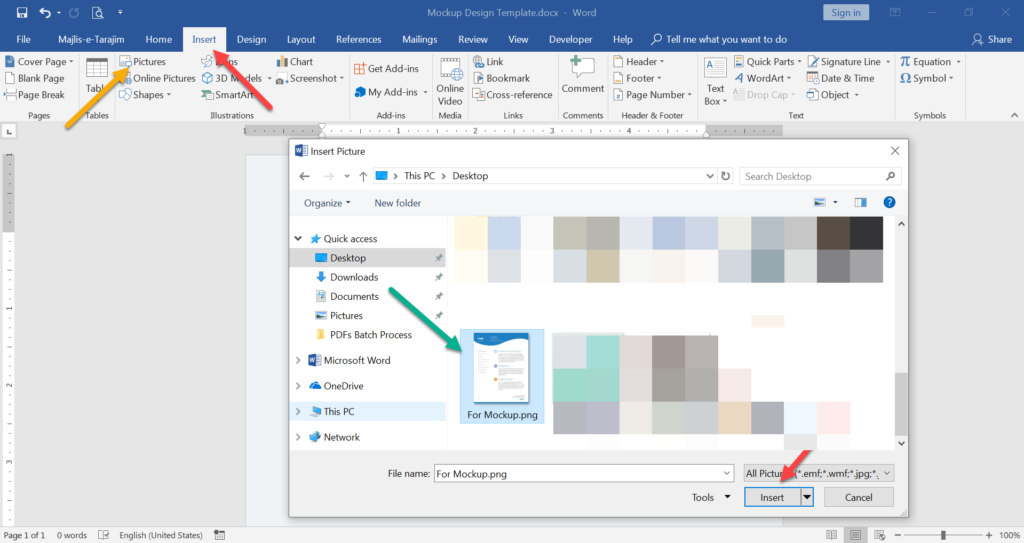
Now import the PNG you have created earlier into the Word document. Go to the Insert tab and click on the “Pictures” button. Browse to your image and insert it by simply clicking on the Insert button.
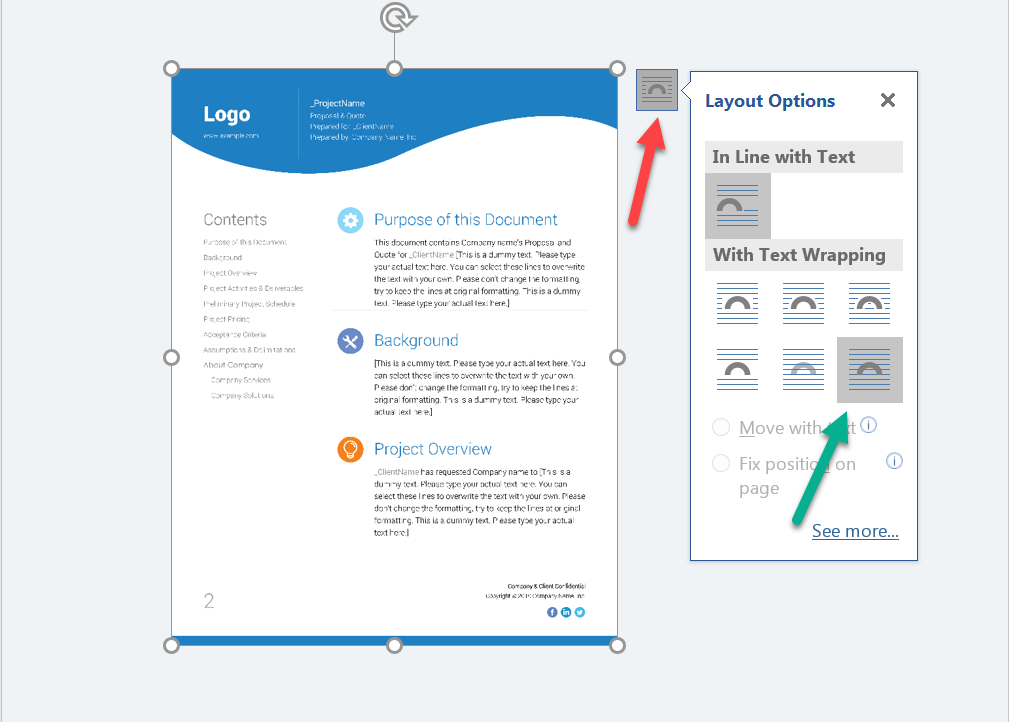
Select the image, then click on the “Layout Options” icon and select the “In Front of Text” option.
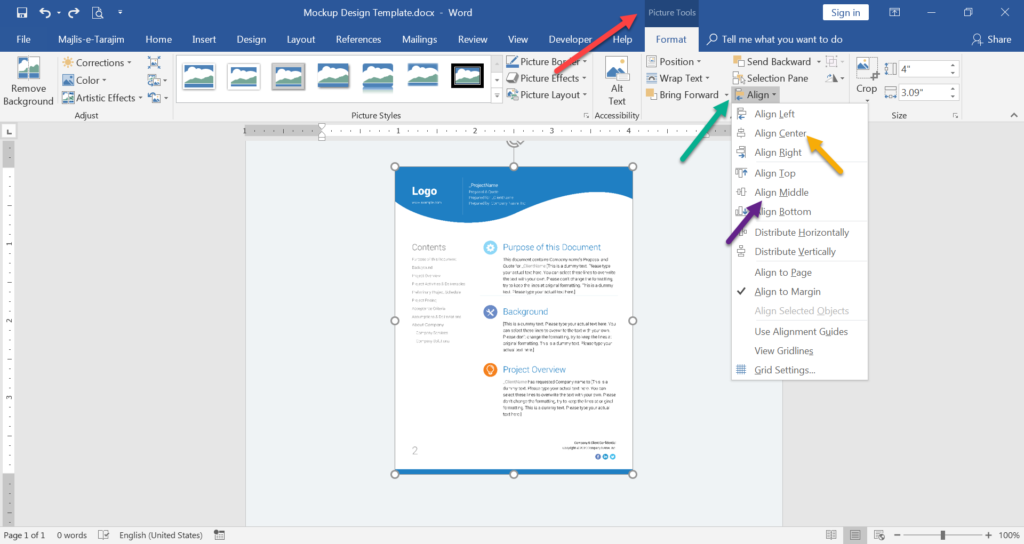
Again select the image, go to the Picture Tools > Format > Align and click on “Align Center” and “Align Middle” to properly align the image at the center of the page.
Now move the rotation handle to a little left to rotate it at 356 degree. To apply effects, right click on the image and click on “Format Picture…” to open the picture effects options at the right pane.
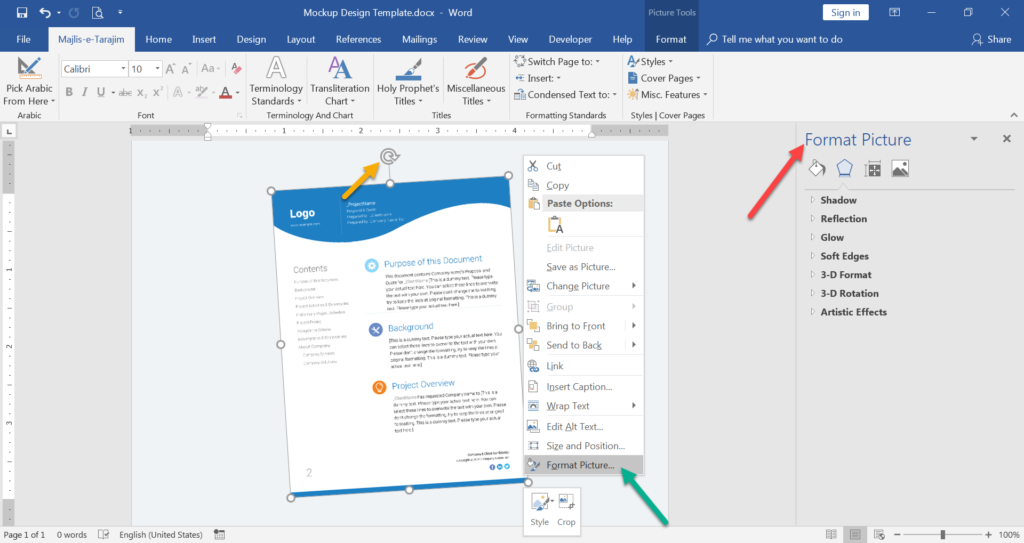
We will apply two effects – Shadow and the Reflection. While image being selected, expand the Shadow group > from the Presets > Select “Offset: Bottom Left“. Then expand the Reflection group > from the Presets > Select “Tight Reflection: Touching“. Now change the values in Shadow and Reflection groups as showing in the image below:
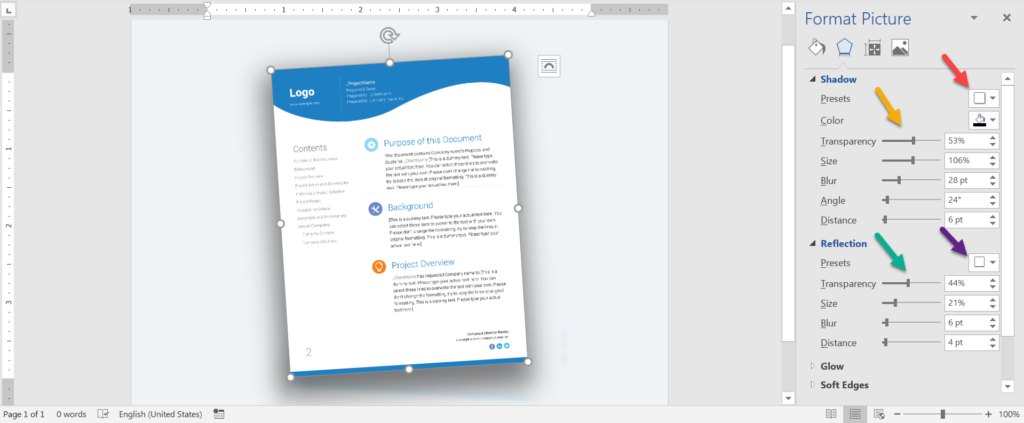
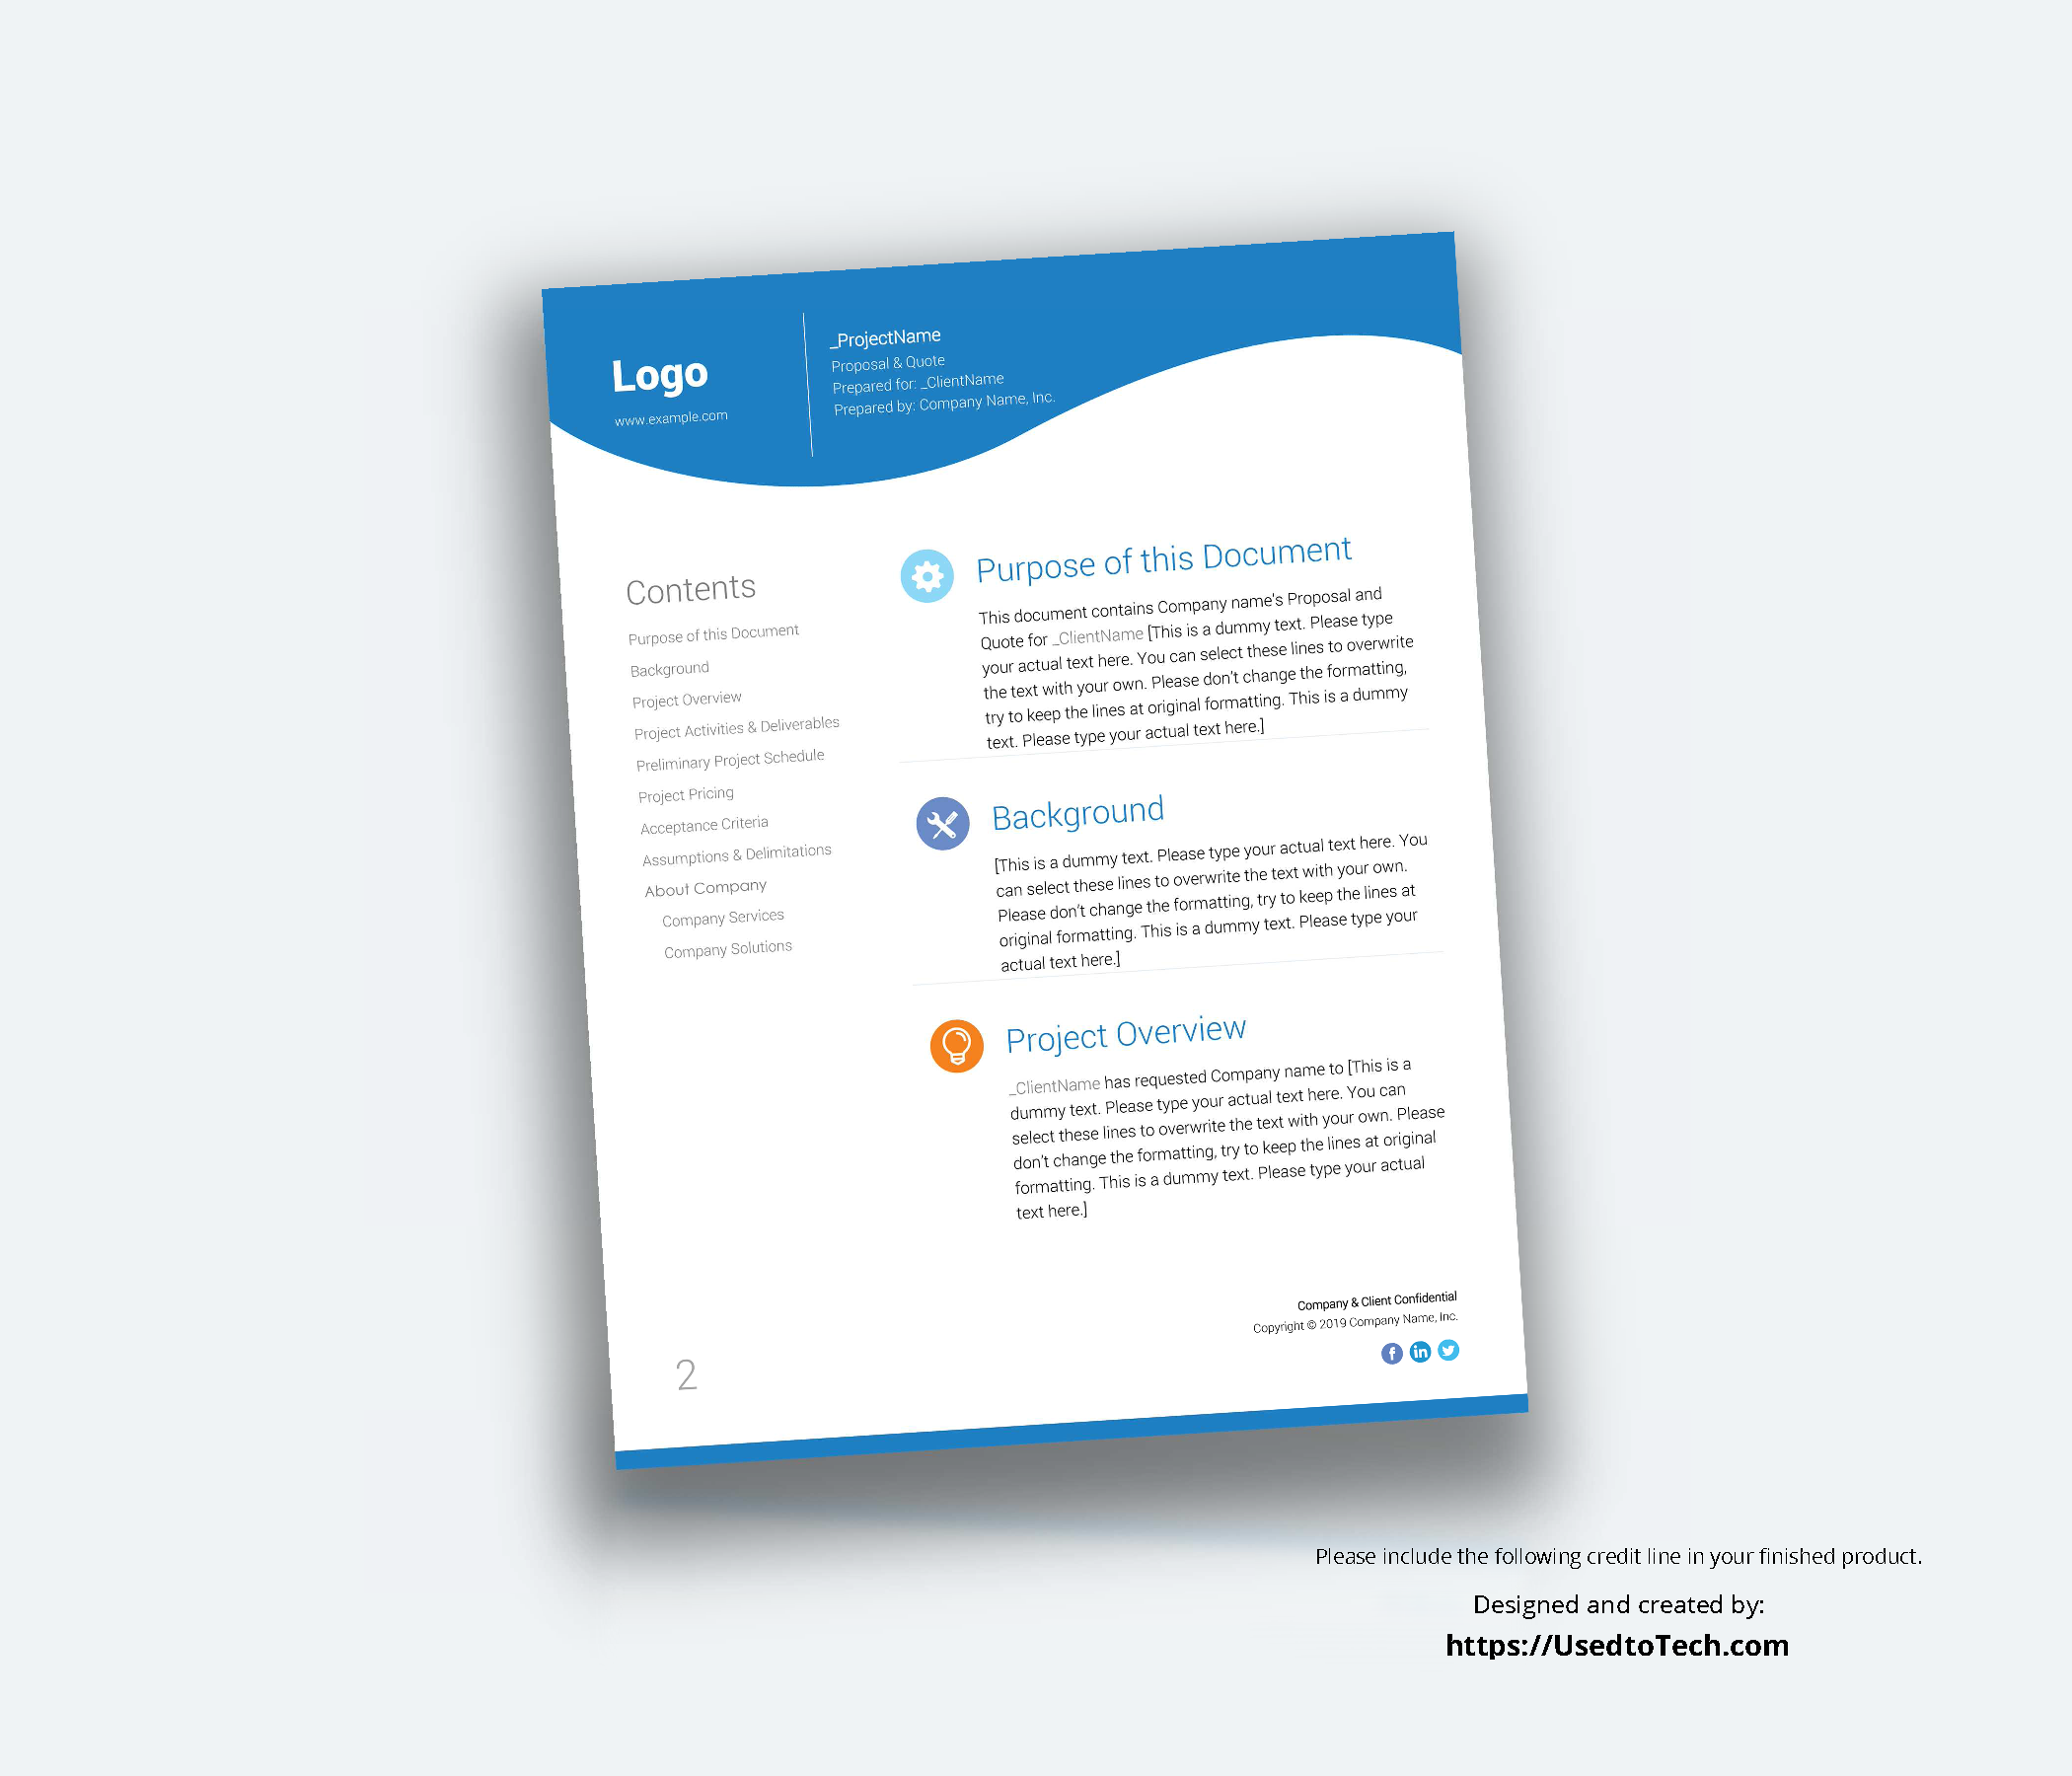
Save your file. Mockup is ready in Ms Word.
Convert Ms Word mockup to PNG
To convert your Word mockup to PNG, the best way is to first convert it to PDF. You can use Ms Word’s “Save as PDF” option to turn the mockup into PDF. For the best results, try any “Virtual PDF Printer” instead of Ms Word Save as option to convert the Word mockup into PDF. And to finally convert your PDF into PNG, read the process above Convert PDF to PNG in Acrobat.
Download flyer mockup template in Ms Word
If you like it, share your thoughts in the comments box. To save your time and to batch process PDFs, see another useful post here Batch process on PDFs in Adobe Acrobat.
thank you for sharing